


If you have been toying with the idea of opening your own e-store, either through off-the-shelf solutions like Shopify, or joining platforms like Etsy or Amazon, then you will have surely come across the question on how to produce beautiful images that sell your product. Professional product photographers can surely provide you with all the great images your product deserves, but they come at a price which you might not be ready to pay, yet. Not all is lost, though: there is plenty you can do to take amazing pictures that look very professional and will make your product shine.
Images that sell
Pictures of the product being sold are crucial to the success of your online store. You are presenting your product to people who cannot hold the product for inspection in their hands, so they have to rely on image to determine whether they like the product and trust you as the seller. As odd as this may sound, the perceived value of your products is judged by the quality of their images. You will want to shoot (pun intended :-)) for crisp, well focused images, where all details are clear, and colors are faithful. Let’s get to work.
DIY product photography tips
Let’s go through the steps of setting up a simple product photography stage, for business owners on a budget. You will be impressed by how easy this is, and how great the results will be by just following few tips.
What You Need
Let’s see what we need for a very budget friendly product photography stage, that is going to cut it for producing great images. In some cases, I will list an option or two, so pick the one that you feel more comfortable with. Or otherwise try both, and see. Remember also that you can borrow things that you may not have, at least until you find this worthwhile of your time.
1. Camera
For taking the picture, you will need a camera, obviously. The choice is very simple here: use the best camera you have at your disposal. This could be your fancy DSLR, your point-and-shoot, or even your smartphone. If your smartphone camera isn’t good enough, consider borrowing a point-and-shoot from a friend, or have them over for a coffee and a weekend project!
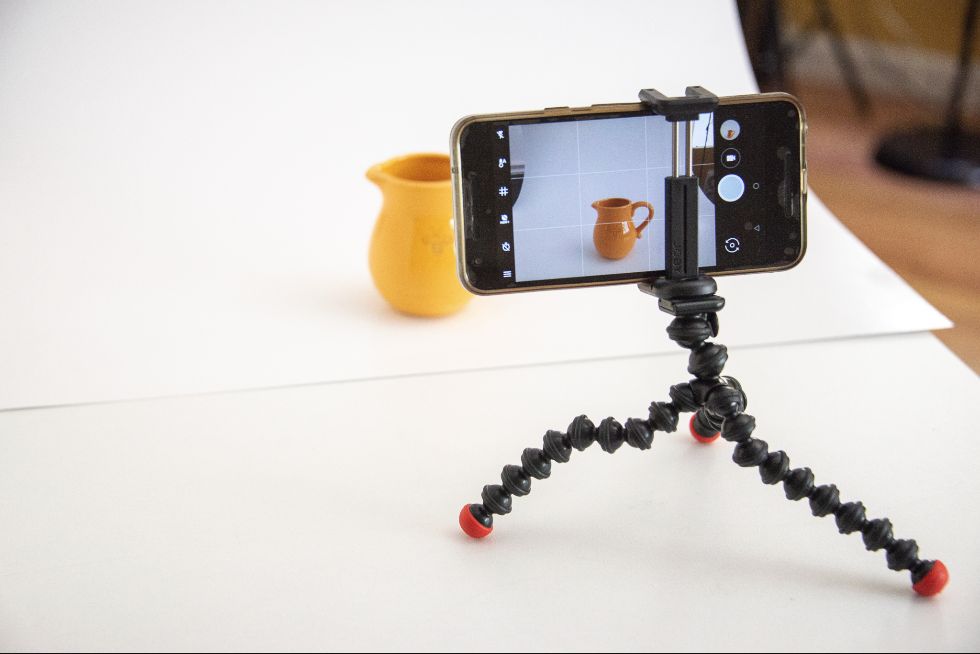
2. Tripod
A tripod will make your life much easier in many ways. First, it allows you to keep your images consistent. Also, it allows for longer exposures, should you need to do so. You don’t need an expensive model. You can get away with just about anything solid enough to hold your camera. And if you are using a smartphone, you may find an adapter for your tripod, or simply get a specialized tripod. Remember, you can always borrow one for a weekend from your friends.
3. White background
My go-to solution here is a humble white poster board. Pick up one or two at your dollar store, making sure they are clean, wrinkle free at least on one side. Don’t fold them, we’ll want them in their unfolded glory. Also pick one or two foam boards. They are cheap as well.
4. Table
We will use this to position your products on.
5. Light source
Light consistency is probably the most important component in product photography. Once again, you can either get the expensive strobes or hot lights at your favorite camera store, or you have other options. The cheapest is definitely to use the natural light from a window. If your room has access to that, then you cannot ask for better light source. For something not dependent on the sun, a couple of clamp shop lights will do the trick. With the new LED light bulbs, they can provide quite some light at low cost. I would recommend at least 2 of them, each at 75W equivalent, with a temperature of 5000K (a.k.a. daylight) which will help in getting whiter whites. Very important: try not to mix different bulbs, or light sources.
6. Miscellaneous items
To put the whole rig together, you will need things like: painter’s tape (won’t leave marks), scissors, a utility knife, parchment paper. If you have clamps in your garage, they might prove useful, otherwise just get some duct tape also.
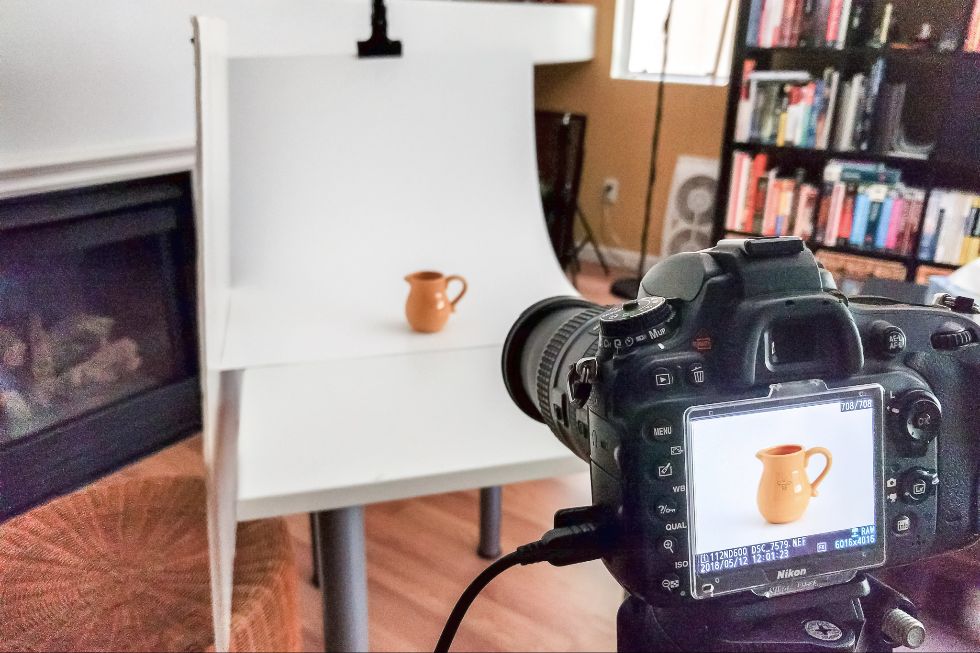
The setup
Position your table against a wall, then tape the poster board to the table, at a distance that allows you to position your item on it, while leaving enough of the board for you to tape on the wall to create a seamless white backdrop. The tripod and camera (or smartphone) is in front of the table. Pick a height and distance such that you recreate the familiar ecommerce “look”. For this, you may have to tilt the camera a little, get closer to the object, or get lower.
Handling the light
Depending on your light source, you may need to make some adjustments. If you are using a window, then the light should be coming from one side. This will inevitably create a lighter side and a darker side in your images, which is not ideal. You can though introduce a very simple and effective reflector, by cutting a piece of foam board, fold it and position it parallel to the window, on the darker side of your item. By just playing with angles, you will see most of the darkness gone.
When using the two lights, you position one light at each side. This will also help enhance the borders. You may need to clamp the lights to different objects, and it’s all fair game, as long as they stay out of the final picture. If the light is too harsh, you can play with distance or even cover the lights with a square piece of parchment paper. Be mindful of undesired reflections on shiny objects, in which case you might have to reposition the lights, or try with larger pieces of parchment paper.
Camera settings
For the finest images, you will need depth of field, so that nothing is out of focus. Depending on the camera, you can use Aperture Priority, and go around F/5.6 or higher. This in turn will lower your shutter speed, hence the tripod comes in handy allowing you to both keep your ISO low, and get a shake-free image. You can learn more about this in my tutorial about camera settings. If you need several images for the same item, then Manual Mode is preferred, as that will yield the same exposure for a consistent set. If you are using a smartphone, check out my tutorial on smartphone photography.
Variations
Several variations of this setup are possible, of course. The principles remain the same: provide a seamless white background, a solid light source, reduce glare and shadows, make sure your camera settings are correct and the frame is filled with a good composition.
Light box kits
If you are willing to spend a few extra dollars, you can get a light box kit like this one or this other one. This way you won’t need to spend time sourcing the various elements, and you get a portable kit that is easy to manage and store. Features and components vary, so check them out first.
Editing
If all goes well, editing should be reduced to just cropping the images to select the subject. In reality you might have to check the white balance, to make sure the white background is really white. In some cases you may have to cleanup some blemishes, or imperfections on the object or the background. You might also have to cut-out the product, to provide a transparent background. Most of these are really advanced edits. If you believe you need them, a professional digital image editor will definitely be able to help, or you can contact your local professional ecommerce photographer.
Professional vs DIY
Most small ecommerce website owners can handle their photography needs on their own. If you don’t have have lots of products, and their lighting is fairly simple, then there is little reason to call for professional help. On the other hand, if the business is picking up, then it starts making sense to outsource tasks that are not core to the business. Involving a professional ecommerce photographer will allow you to get consistent, fast and proven results. After all, that is their core business, and they can help you to stand out of the competition. As you grow, you may need to showcase more photographs per item, at different angles, or color combinations; or even include a model in the photo; provide lifestyle images; resize images for different needs, like different resolutions, but also different sizes for Instagram and Facebook posts. The list goes on.
Conclusion
When it comes to ecommerce stores, great pictures put customers minds at ease, making them feel confident to buy your products. If you are on a budget, there are several inexpensive ways to produce great professional looking images for your e-store. When the image creation process starts taking a sizeable chunk of time away from your core business, it is time to outsource and hire a professional.
