


Originally published 2014/03/27. Reposting with updates.
Today’s tutorial will cover a property called “sharpness” and how its manipulation affects an image.
What is sharpness?
Sharpness of an image describes its edge contrast, in other words how well defined edges are in the scene. Sharp images are clear and defined, easy for the eyes to follow and decode. Non-sharp, or soft, images have blurred edge lines that makes them more elusive to the eyes.
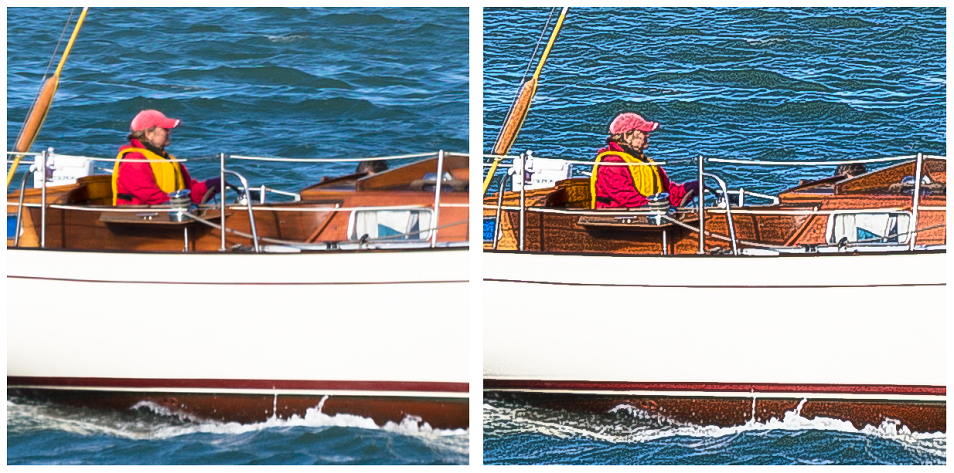
Sharpness processing involves the areas along edges, where there is already a demarcation between two areas. Increasing sharpness amplifies the edge effect, thus making it more evident and generally more appealing; this action is described as sharpening. Decreasing the edge effect, softens the demarcation between two areas, making it less evident; this action is described as softening and in some cases blurring.
Sharpness in camera
Sharpness can be controlled in camera at capture time. Lenses are praised for their sharpness, and their price reflect this. On the other hand, special softening filters can be added to the front lens to create a mild softened effect. Aperture, affecting depth of field, will generally blur and reduce sharpness of those parts of the scene that are not in focus. Out-of-focus pictures tend to not be sharp, but you generally would discard those, unless it was the desired controlled effect.
Sharpness manipulation
Manipulating sharpness is a bit tricky, as it can amplify noise, overly emphasize texture (over-sharpening) and in general produce unnatural results.
So, while most of digital images need some sharpening, you should take some care in doing so. Keep also in mind that JPEG images are already sharpened, and generally need less than RAW. A great tutorial on this topic written by Nasim Mansurov explains very clearly what to look out for, and how to perform good sharpening in Adobe Lightroom.
Sharpness and skin
While large smooth areas are not interested by sharpness, speckles present on it are. This is particularly important when sharpening skin, as its pores, hair and imperfections get greatly amplified by a sharpening action.
As to get an idea, you would want to soften skin in its wider areas, as to blend blemishes, and increase sharpness around the edges. Please do refer to tutorials specialized in portrait and skin processing, as there’s much more to skin smoothing than just softening.
Sharpness in Adobe Lightroom
In Adobe Lightroom, sharpness can be modified in the Develop module.
Sharpness has four settings, amount, radius, detail and mask, which may be named differently in other software products.
Amount controls the intensity of the effect, radius how deeply to process the edge contours, and mask allows to select where you want the sharpening action to be focused on.
Note that increase in sharpness will not recover a blurred image, neither the out-of-focus ones, much less the motion-blurred ones. It may make it better for mild softness, but never perfect.
For more controlled effect, the Adjustment Brush allows you to select the areas where to modify sharpness. Blur – including gaussian blur – is something more advanced and available in editors like Adobe Photoshop and the likes.
Summary
Let’s now summarize the key points around sharpness that we have covered above:
- Sharpness measures the edge contrast of an image
- Increasing sharpness amplifies the edges and creates more separation of elements in the scene
- Decreasing sharpness softens the scene by blending smaller objects first.
Check out my other tutorials in the Education section!
